Dedicated to all those recipes you see on facebook that mysteriously disappear - even after you save them to your wall so you can find them again!
Thursday, September 25, 2014
Melting Snowman Cookies
Prep Time: 1 Hour
Yields: 1 Dozen Cookies
Ingredients:
1 dozen sugar cookies
1 pouch Betty Crocker White Cookie Icing
1 pouch Betty Crocker Black Cookie Icing
1 box Betty Crocker Classic Colors Writing Icings
1 bottle Betty Crocker Rainbow Sprinkles
12 marshmallows
Instructions:
1. Ice cookies with White Cookie Icing. Allow icing to drip off sides to create melting effect.
2. Let cookies dry for 30 minutes.
3. While cookies are drying, cut about ¼ inch off the marshmallows to shorten the snowman’s head. Use Black Cookie Icing and Orange Sprinkles to make faces on the marshmallows.
4. Once White Cookie Icing has crusted over, adhere marshmallows carefully by adding a small amount of additional White Cookie Icing to bottom of marshmallow.
5. Add remaining decorations with Cookie and Writing Icings.
6. Cookies will be completely dry within 4 hours.
Notes: Use a homemade royal icing so it's white and not dirty looking. The recipe is a copycat recipe. Buttercream doesn't set like royal icing... I've been making these for years. Thin out your royal icing and it spreads nicely and looks like a puddle. While icing is still wet melt marshmallows in the microwave on a Pam sprayed plate for a few minutes and place on your cookies (don't cut your marshmallows, no need) Wait to dry and decorate with colored royal icing. This way you can package them... All homemade... And cheaper than buying icing. Just my own preference but I wouldn't put your cookies back in the oven to melt the marshmallow or icing so you don't over bake the cookie...
(or melted witches)
Brings to mind the easy witch hat cookies I make when in a rush but need to bring something to a Halloween party. Take those already made chocolate striped butter cookies. Flip over to the chocolate side. Take a chocolate candy kiss and dip bottom in orange frosting enough to "glue on" the extra squeezes out to make a rim. Done. No bake...put on cookie trays and muss your hair up , put flour: on your face and suggest how hard you worked!
better than fries baked potato
PS. If you have to ask centigrade or Fahrenheit, you probably shouldn't be cooking in the kitchen. 425 Centigrade would be around the temperature inside a volcano!
Tuesday, September 23, 2014
Halloween snack ideas
Remember, banana's brown fast. You could freeze them tho!
Sunday, September 21, 2014
The perfect fall cheese ball
The Perfect Fall Cheese Ball
Ingredients
- 16 oz cream cheese, room temp
- 2 cups cheddar cheese
- 3 tbsp minced onion
- 3 tbsp salsa
- 1 tsp ground cumin
- 2 cups nacho cheese chips, crumbled
- top of 1 bell pepper for stem garnish
1. With a mixer, combine cream cheese, cheddar, onion, salsa and cumin. Mix until creamy.
2. Scoop mixture onto plastic wrap and use wrap to form a ball and chill for at least 2 hours.
3. When ready to serve, roll ball into the crushed nacho chips and place bell pepper stem on top. Serve with chips, vegetables or pretzels!
5.0 from 2 reviews
The Perfect Fall Cheese Ball
Prep time
Cook time
Total time
Serves: 12
Ingredients
- 16oz cream cheese, room temp
- 2 cups cheddar cheese
- 3 tbsp minced onion
- 3 tbsp salsa
- 1 tsp ground cumin
- 2 cups nacho cheese chips, crumbled
- top of 1 bell pepper for stem garnish
Instructions
- With a mixer, combine cream cheese, cheddar, onion, salsa and cumin. Mix until creamy.
- Scoop mixture onto plastic wrap and use wrap to form a ball and chill for at least 2 hours.
- When ready to serve, roll ball into the crushed nacho chips and place bell pepper stem on top. Serve with chips, vegetables or pretzels!
home canned salsa
This makes a mild salsa, thick with tomatoes. I heat everything up in my 12 quart, heavy bottom stainless steel pot. It doesn’t need to be cooked, per se, but it should be steaming hot when you pack it into jars. Dice the seasonings fairly fine, about 1/8 inch cubes, either with a food chopper or by hand. I tried both the vinegar and lemon options, but I like the flavor of the vinegar better. The original recipe used cilantro instead of parsley, but my parsley grows well and my cilantro doesn’t, so I use what I have on hand. I generally skip the cumin. I make no claims as to this being “authentic” salsa. I’m of predominantly Eastern European descent and have lived in the Upper Midwest all my life, so I haven’t got a clue. My family and I (and our friends) like it, so it works for us.
Ingredients
Tomatoes – about 20 lbs, skinned, seeded
3 cups chopped onions | 1 Tablespoons of oregano |
2 cloves of garlic, minced | 1 cup diced assorted mild peppers (red, yellow, orange, banana, whatever you have) |
1/4 cup diced, fresh parsley | 1/2 teaspoon black pepper |
1/4 cup diced celery | 1 to 4 diced jalapeno peppers |
1 tablespoon sea salt | 3 (6 oz) cans of tomato paste |
1 cup 5% apple cider vinegar | Optional: 1 Tablespoon ground cumin
Optional: 1/4 cup Clearjel
|
Blanch and skin the tomatoes. Put them in boiling water for 30 to 60 seconds, until the skins start to split. If you put a little nick in the skin with a knife before you drop them in the water, the skin will split faster, avoiding overcooking and keeping them from turning into mush.
After the skins start to split, fish out the tomatoes and put them in cold water. Once the tomatoes are cool enough to handle, put child labor (if available) to work slipping off their skins while you continue blanching the rest.
Squeeze the tomatoes and toss into a colander or drainer, while you work on others. This helps more of the water to drain off. You may want to save the liquid: if you then pass it through a sieve, screen or cheesecloth, you have fresh tomato juice; great to drink cold or use in cooking! Next chop them up into roughly 1/2 inch size cubes. The boys were doing a lot of the chopping, so heaven only knows what size those chunks were, but it works.
Mix ingredients in the pot and bring the sauce to a gentle simmer
Start with the chopped tomatoes in the pot.
Add the seasonings and bring to a gentle simmer, just to get it hot – there’s no need to cook it; only to get it hot enough to ready it for water bath processing to kill any bacteria and enzymes.
Taste it as it cooks. If you like the sauce hotter, add 1 Teaspoon of chili powder. Here’s a shot of the wicked pepper. Sorry for the photo quality – the camera is showing its age.
I save the hot pepper as the last thing to be cut up, being careful not to cross-contaminate my cutting board. I wear gloves and minimize handling, using my knife to manipulate the pepper on the cutting board and to scrape it into the salsa.
For a thicker salsa, add 1/4 cup Clear Jel (which is ultrafine cornstarch), dissolved in the vinegar before adding to the mix. When I first made this recipe, Clear Jel was not available. It is now the preferred product for thickening when canning.
Fill the jars with sauces and put the lid and rings on
Fill them to within 1/4 inch of the top, seat the lid and hand-tighten the ring around them.
Boil the jars in the canner
Put them in the canner and keep them covered with at least 1 inch of water. Keep the water boiling. Process the jars in a boiling-water bath for 15 minutes for 8 oz and pints and 20 minutes for quarts. If you have a pressure canner, use it and process the sauce for 10 minutes for pint jars and 15 minutes for quarts, at a pressure of 10 to 11 pounds. Makes around 12-13 pints.
Ta-da! A tasty batch of salsa to enjoy throughout the year that tastes a lot like a very popular national brand which shall remain unmentioned here since I don’t want to get sued.
Thursday, September 18, 2014
Candy Christmas tree
made up with 2 Miniature Reeses Peanut Butter Cups, 1 Regular Reeses Peanut Butter Cup, 1 Hershey Kiss then decorate.
Wednesday, September 17, 2014
Pumpkin Sugar Cookies with Cinnamon Cream Cheese Frosting
Prep Time: 30 minutes
Cook Time: 12 minutes
Yield: About 2 dozen
Ingredients
- 3 cups all-purpose flour
- 2 tsp cornstarch
- 1 tsp baking powder
- 1/2 tsp baking soda
- 1/2 tsp salt
- 1/2 tsp ground cinnamon
- 1/4 tsp ground nutmeg
- 1/4 tsp ground ginger
- 1/2 cup unsalted butter, softened
- 1/3 cup unflavored vegetable shortening
- 1 1/4 cups granulated sugar
- 2 large egg yolks
- 2/3 cup canned pumpkin puree
- 1 tsp vanilla extract
- 3 oz cream cheese, softened
- 3 Tbsp butter, softened
- 3/4 tsp ground cinnamon
- 1/2 tsp vanilla extract
- 2 1/2 cups powdered sugar
- 1 - 1 1/2 Tbsp milk
Frosting
Directions
- For the cookies:
- Preheat oven to 350 degrees. In a mixing bowl whisk together flour, cornstarch, baking powder, baking soda, salt, cinnamon, nutmeg, and ginger for 20 seconds, set aside.
- In the bowl of an electric stand mixer fitted with the paddle attachment, cream together butter, shortening and sugar until pale and fluffy. Mix in egg yolks one at a time. Mix in pumpkin puree and vanilla extract. With mixer set on low speed, slowly add in dry ingredients and mix until combined.
- Scoop dough out and shape into 3 Tbsp balls (I just filled 1/4 cup 3/4 full). Place on baking sheet (you'll only be able to fit about 8 per sheet, these are fairly large cookies), and using your fingers lying flat, evenly flatten cookies into rounds until they are slightly under 1/2-inch thick. Bake in preheated oven 11 - 12 minutes. Cool on baking sheet several minutes then transfer to a wire rack to cool completely. Once cool frost with Cinnamon Cream Cheese Frosting. Store in an airtight container.
- For the frosting:
- In the bowl of an electric stand mixer fitted with the paddle attachment, whip together cream cheese and butter until pale and fluffy. Mix in cinnamon, vanilla extract and powdered sugar. Mix in enough milk to reach desired consistency and mix until smooth and slightly fluffy.
- Recipe Source: Cooking Classy
30 after school snack ideas
As always, please click the link to go directly to the source of each recipe. Thanks!
http://www.thirtyhandmadedays.com/2014/09/after-school-snacks/
FRUITY
Rainbow Fruit Cups from My Frugal Adventures
Watermelon on a Stick from Somewhat Simple
Frozen Grapes from Eating Out Loud
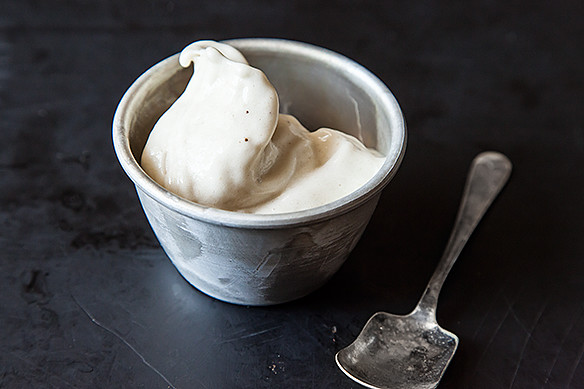
One Ingredient Banana Ice Cream (guess what the 1 ingredient is?) from the Kitchn
Rainbow Smoothie Pops via She Knows
Frozen Yogurt Dots from One Good Thing
Yogurt Bars from Kids Activities Blog
Peanut Butter and Honey Dip via I Heart Naptime
Banana Dog from Living Locurto
Vegetables
Fish in the River via Food.com
Vegetable Flowers via Spoonful
Cucumber Dips from Makes the Best of Everything
Granola / Energy Bites
The best granola bars! from Knitty Bitties
Granola Bar Poppers from Smart School House
Energy Bars from Cookie Mondays
No Bake Granola Bars from Made from Pinterest
Cinnamon Caramel Apple Energy Balls via the NY Melrose Family
Muffins
Applesauce Muffins from Simple as That
Crackers
Apple Cheese Crackers from Somewhat Simple
Homemade Graham Crackers from bebe a la mode
Cracker Letters form Kids Activities Blog
Drinks
Fresh Fruit Flavored Milk from Your Homebased Mom
Berry Green Smoothies from A Pumpkin and a Princess
Protein Smoothies from the Taylor House
Make sure to check out these kid approved lunch box & snack ideas:
Subscribe to:
Posts (Atom)